Knowledge base article
Recording Roland TD-27 USB audio into Tracktion Waveform Free DAW
Introduction
Roland TD-27 module can be used to produce professional drum stems when paired with a PC and a good Digital Audio Workstation (DAW) software.
TD-27 can output 28 channels of USB audio. Each drum pad or cymbal pad connected to the module has its own, dedicated pair of USB audio channels. In addition, there are also 4 input channels provided to play the audio from the PC through the module.
This article will explain the basics of the setup and recording process for electronic drums, with a focus on Traction Waveform Free DAW for Windows 10. The process is similar for macOS. This is just a basic guide to get you started. It may also serve as a starting point for setting up DAW from other vendors, such as Reaper or Pro-Tools.
This guide covers only the basic setup of Roland TD-27 module. For detailed information about this module, please refer to Roland’s support site:
https://www.roland.com/uk/products/td-27kv/support/
For more information on how to install and use Waveform Free, please visit Traction’s website: https://www.tracktion.com/products/waveform-free
Example Waveform project used in this article can be downloaded from here:
TD-27 setup
USB audio functionality must be enabled on the TD-27 module before it can be used for audio recording.
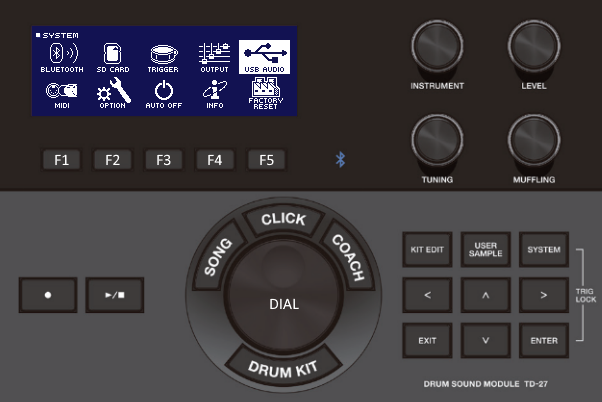
Power up the module and press [SYSTEM] button.
Use cursor buttons or [F5] function button to highlight “USB AUDIO” and press [ENTER] button.
Use cursor-down button to highlight “Driver Mode” and rotate the dial clockwise to set driver mode to “VENDOR”.

Switch off the module and switch it back on. This will activate USB audio driver mode.
While you here, it may be a good idea to increase “Output Gain”. I have found that with my style of drumming (not overly expressive) the volume level on USB audio outputs was a bit too low. I have increased the output gain to +5dB on my module. You will have to experiment with this value to find the right setting. I can definitely say that the input gain should be reduced. -10 … -15dB is a good starting point. You may lose your hearing if you leave it at default 0dB value. You have been warned!
TD-27 USB audio output setup
TD-27 USB audio contains the “close microphones” for each pad; kick, snare, cymbals and so on. Total of 12 stereo channels (or 24 mono channels) are provided. To capture a “full picture” of our drum kit, we need to add overhead microphones and room/effect microphones to our mix.
After many tries, I have found the setup that works best for me. Again, you will have to experiment with these settings.
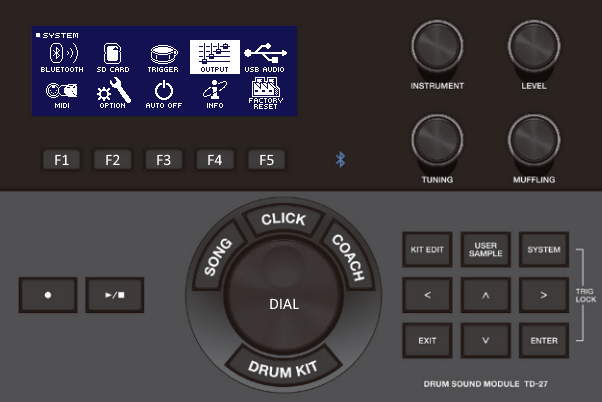
Press [SYSTEM] button.
Use cursor buttons or [F4] button to highlight “OUTPUT” and press [ENTER] button.
Press [F1] button to select PAD MAS tab.
On PAD OUTPUT ASSIGN MASTER (PAD MAS) tab, detach all pads from the MASTER-L/R.
Use left/right cursor buttons to highlight each pad and rotate the dial counter-clockwise to detach the pads. The screen should look like in the picture below.

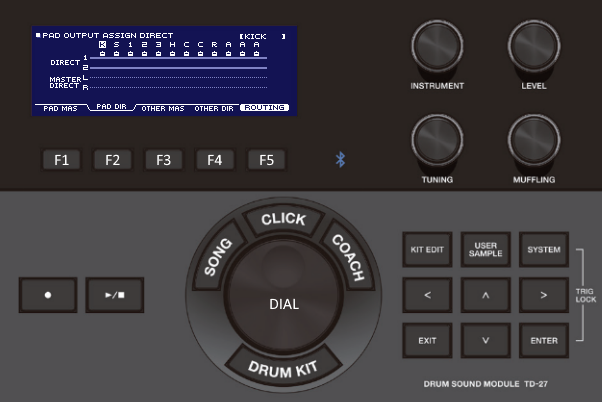
Press [F2] button to select PAD DIR tab.
On PAD OUTPUT ASSIGN DIRECT (PAD DIR) tab, detach all pads from the DIRECT 1/2.
Use left/right cursor buttons to highlight each pad and rotate the dial counter-clockwise to detach the pads. The screen should look like in the picture below.
Press [F3] button to select OTHER MAS tab.
On OTHER OUTPUT ASSIGN MASTER (OTHER MAS) tab, detach all sources from the MASTER L/R, except for OH (Overhead microphones). Leave them connected to MASTER L/R.
Use left/right cursor buttons to highlight each source and rotate the dial counter-clockwise to detach the sources. Rotate the dial clockwise to attach the sources. The screen should look like in the picture below.

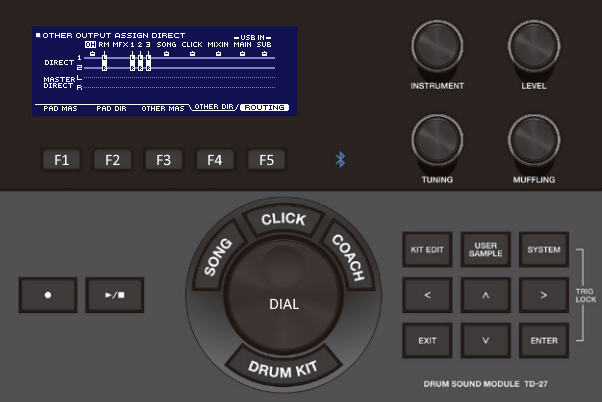
Press [F4] button to select OTHER DIR tab.
On OTHER OUTPUT ASSIGN DIRECT (OTHER DIR) tab, detach all sources from the DIRECT 1/2, except for RM (Room microphones) and MFX 1, 2, 3 (Multi effects 1, 2, 3). Leave them connected to DIRECT 1/2.
Use left/right cursor buttons to highlight each source and rotate the dial counter-clockwise to detach the sources. Rotate the dial clockwise to attach the sources. The screen should look like in the picture below.
TD-27 USB audio is now setup for recording of our drum kit, including the overhead, room and multi-effect microphones.
The list of output assignments for the above setup:
Roland ASIO Driver installation
Connect TD-27 module to your PC using USB2.0 cable. Your PC must be connected to the internet to download the driver.
After few seconds, the driver should be installed. To check if driver is installed correctly, open the “Start” menu and look for “Roland” folder. It should contain “TD-27” shortcut.
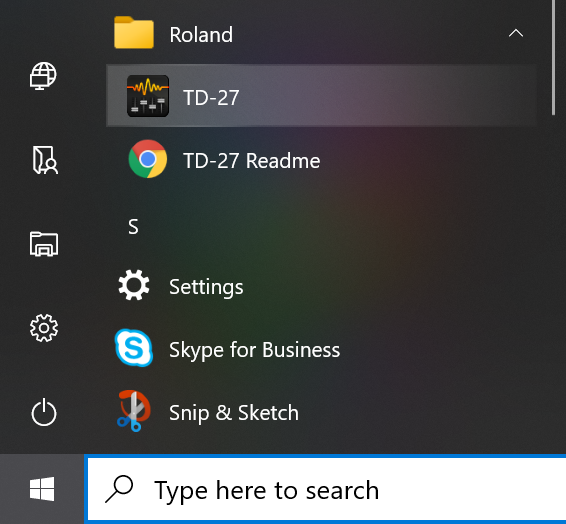
Click on “TD-27” shortcut. TD-27 Driver Settings window should open.
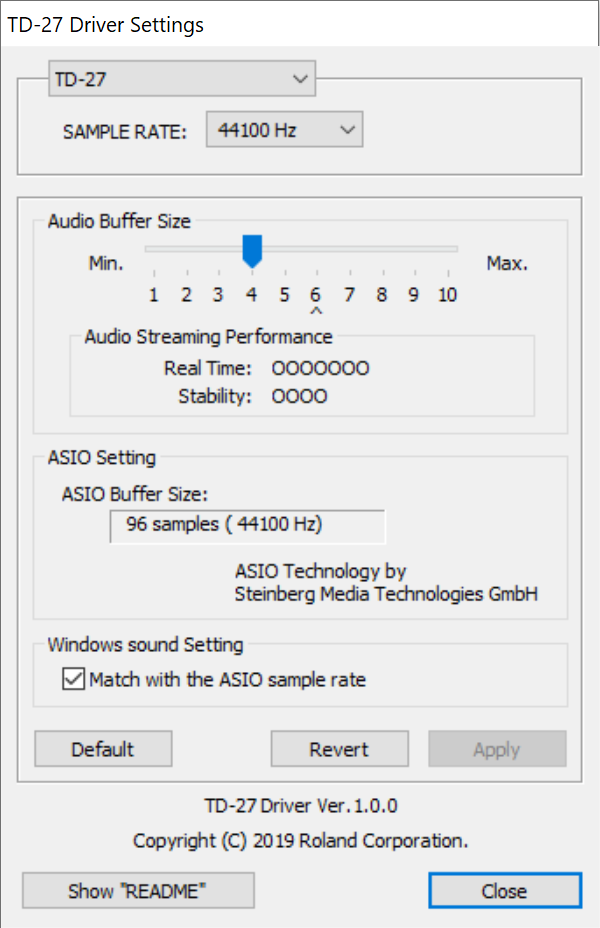
The only setting of concern in this window is “Audio Buffer Size”. The default value is 6 (256 samples). You will have to experiment with this value to find the best balance between the latency and stability of audio streaming for your system. I have it set to 4 (96 samples). This gives me 2.2ms latency and the audio streaming is stable. Such low latency is imperceptible, at least not to me.
Low latency is not important for recording without live monitoring, which is what we will be doing. You don’t have to worry about it for now. It will become particularly important when you start to use VST (Virtual Studio Technology) plugins, such as Superior Drummer 3, but that’s for another time.
We are now ready to setup Waveform DAW for recording from TD-27.
Setting up Waveform DAW
The following part of this article assumes that you have Waveform Free DAW already installed on your PC. For more information on how to install Waveform, please visit Tracktion’s support site: https://www.tracktion.com/training/videos
Launch Waveform Free DAW.
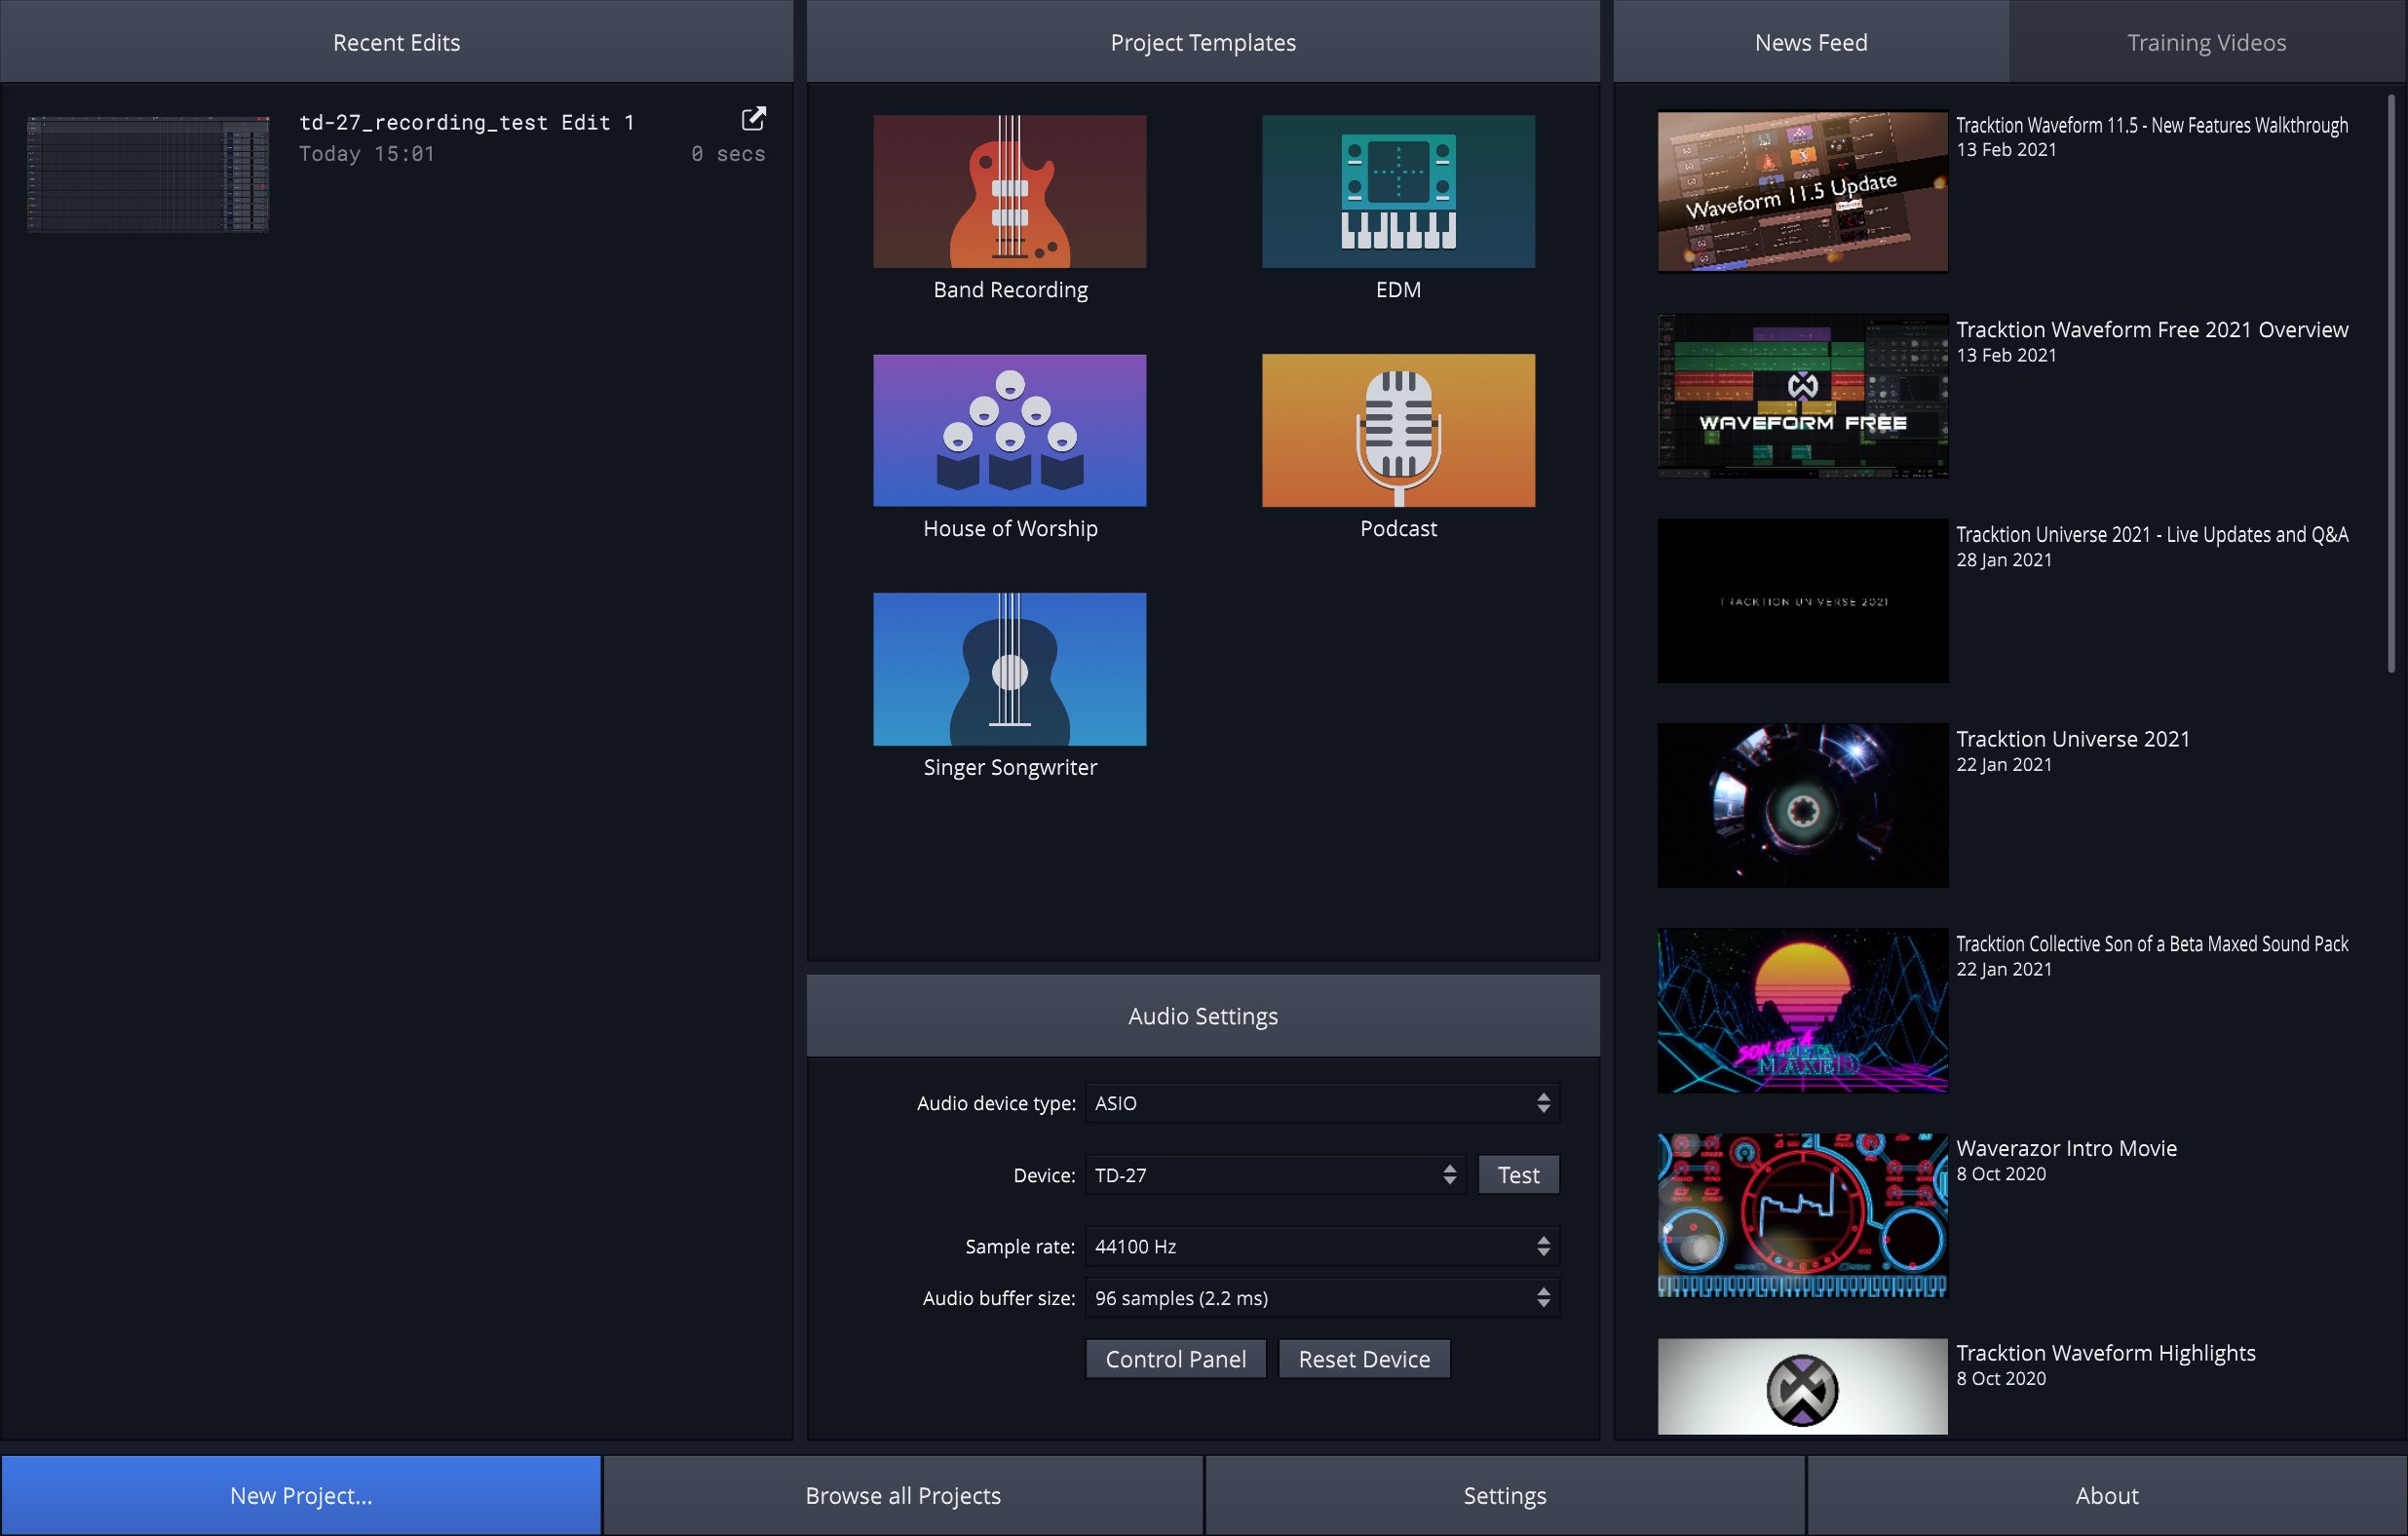
At the welcome screen click “Settings” button.
Select “Audio Devices”.
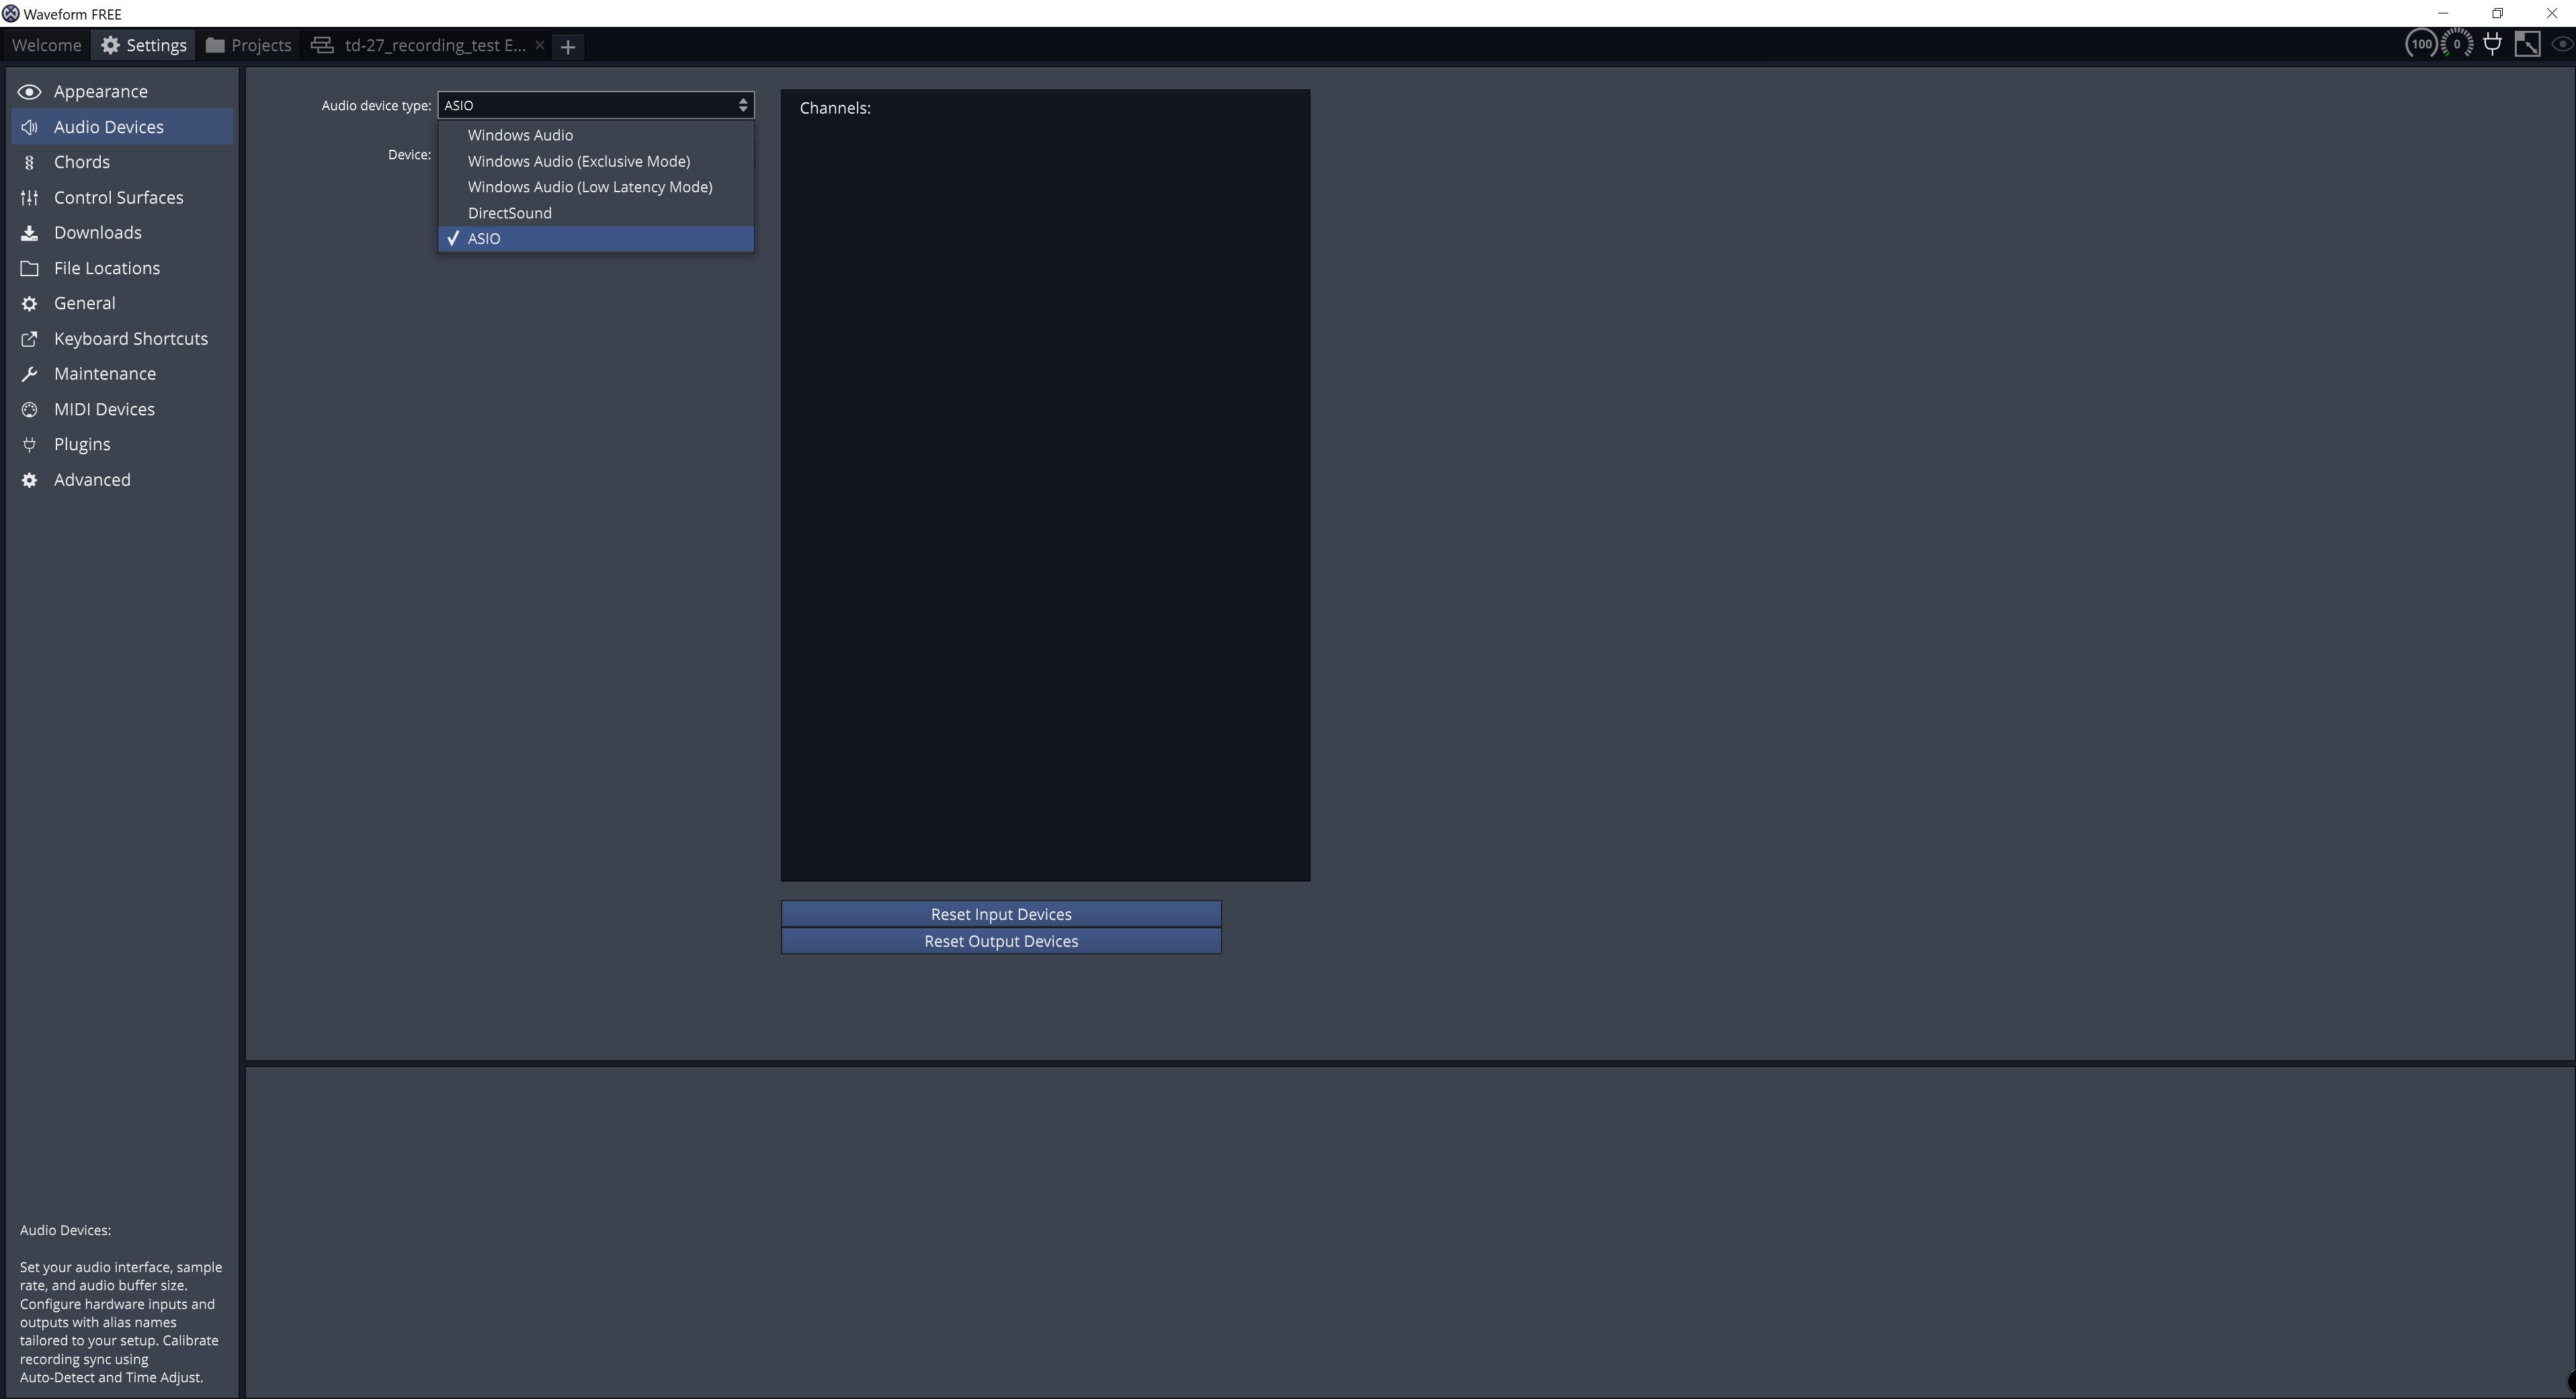
Select “Audio Device type:” and change it to “ASIO”.
In the “Device:” list select “TD-27”.
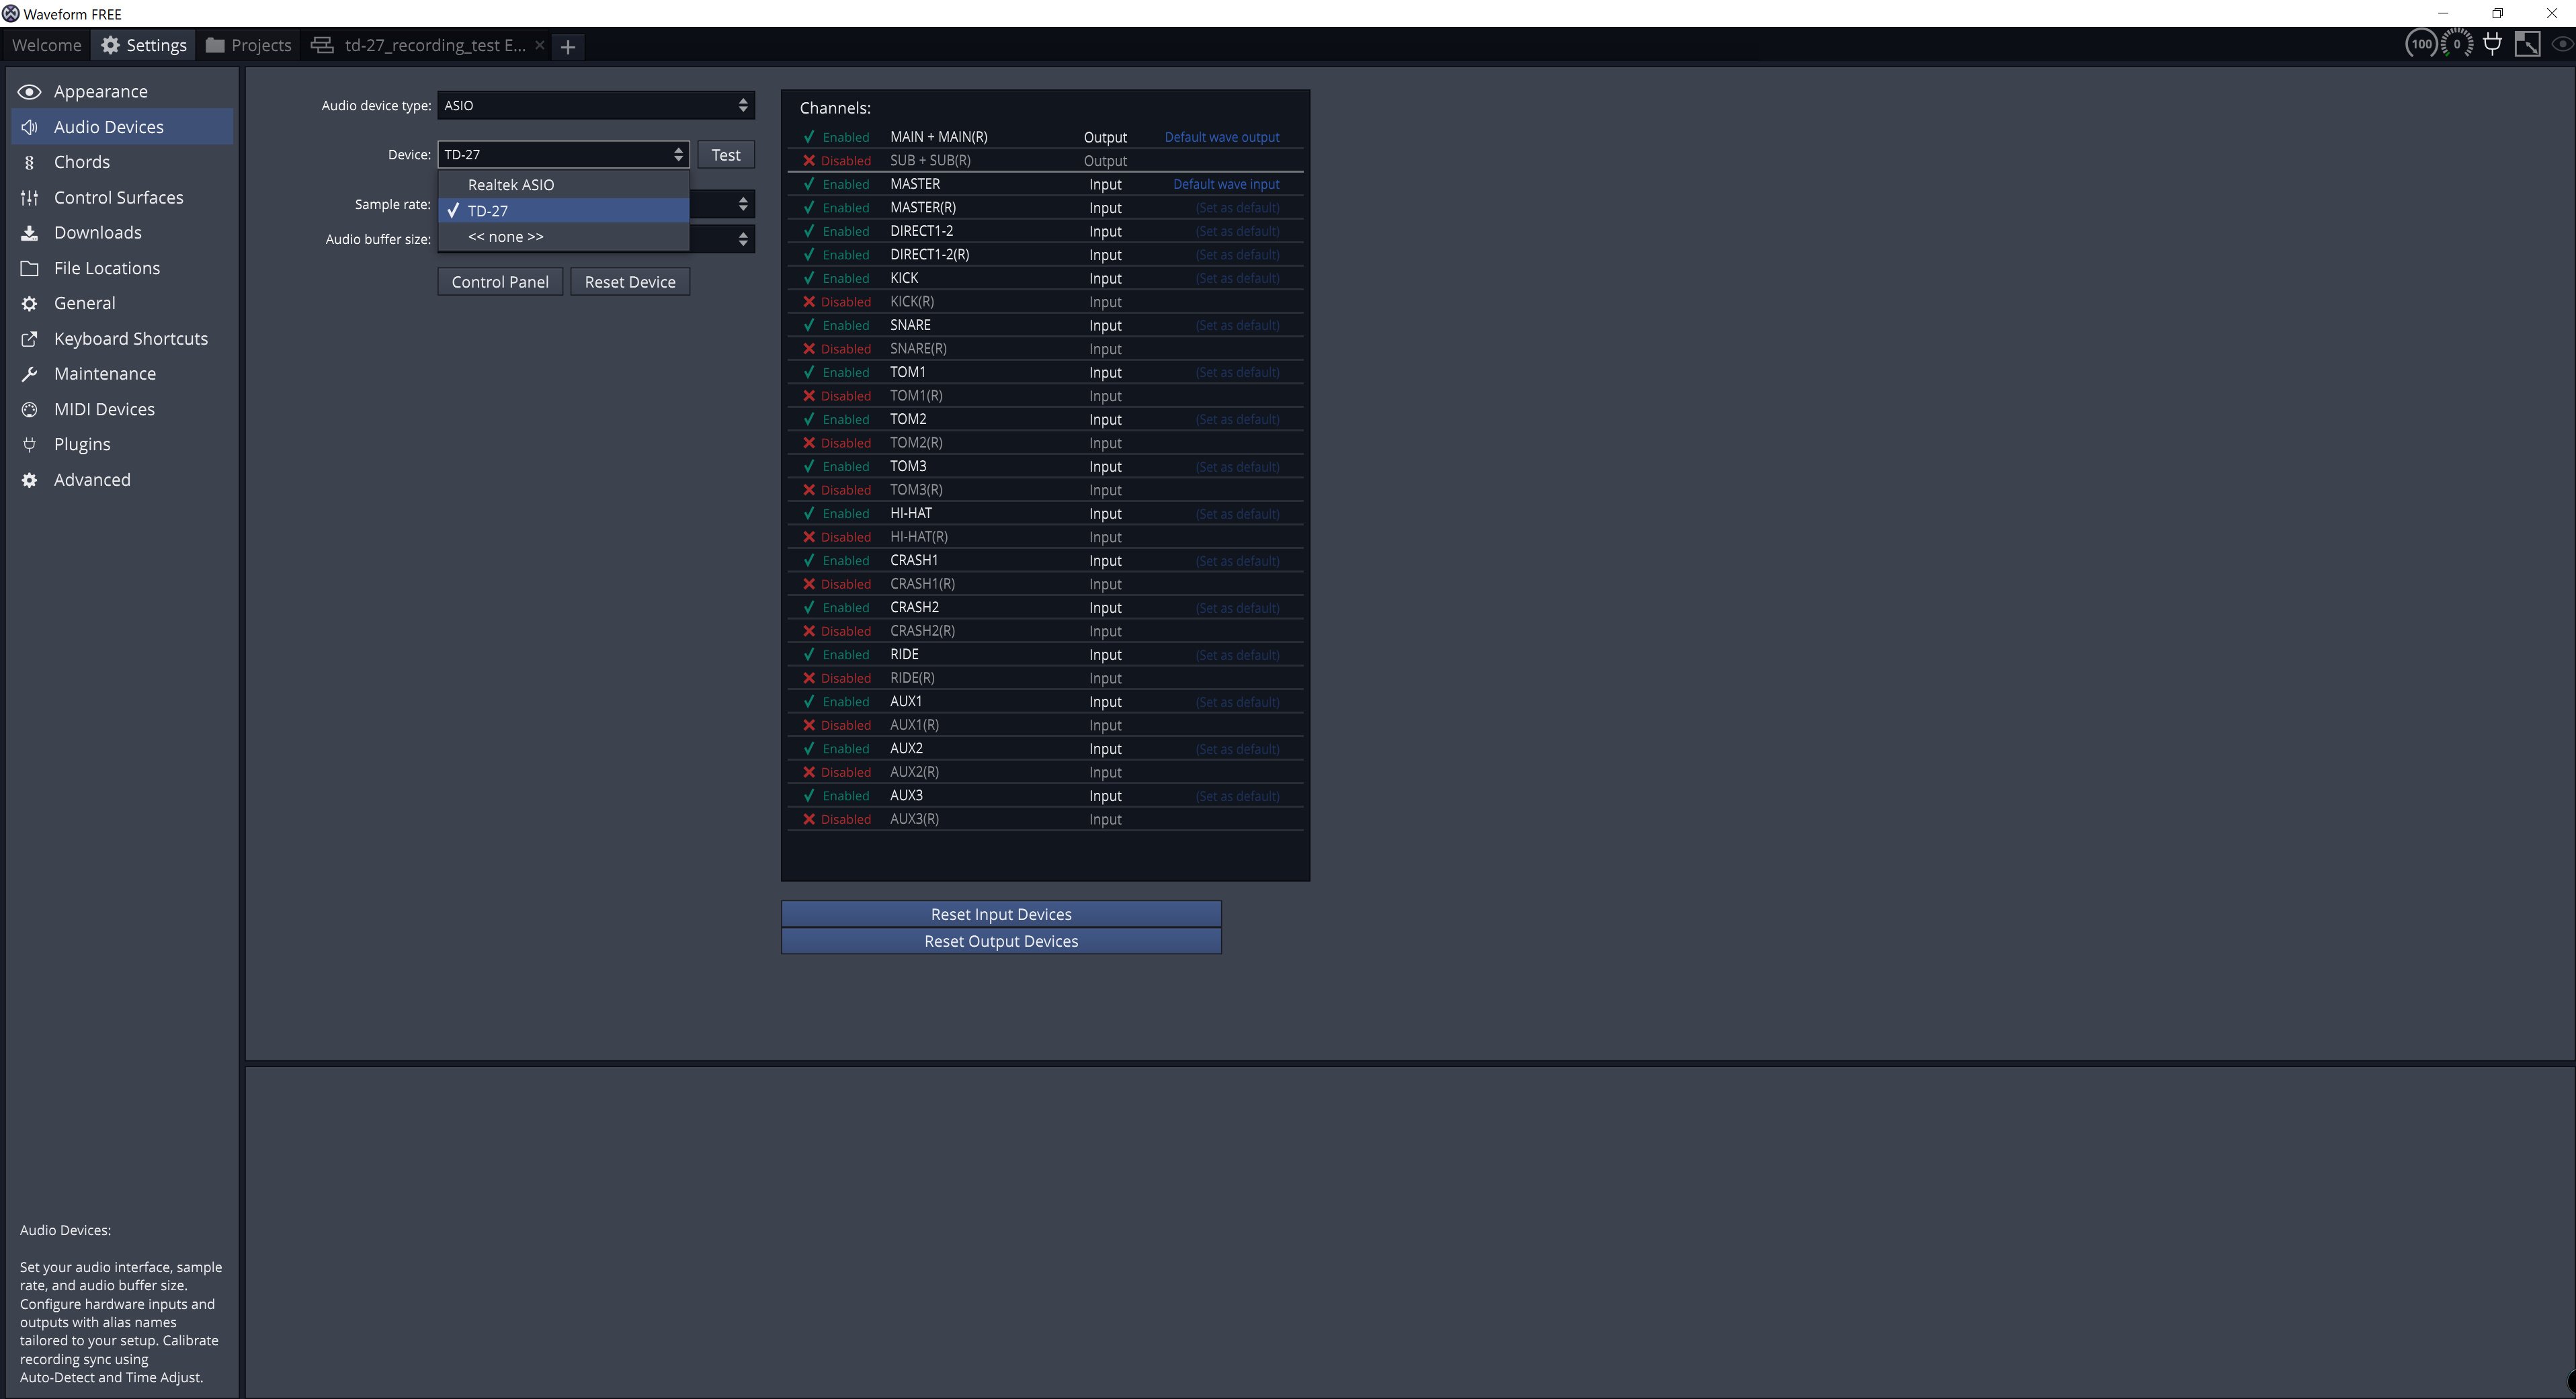
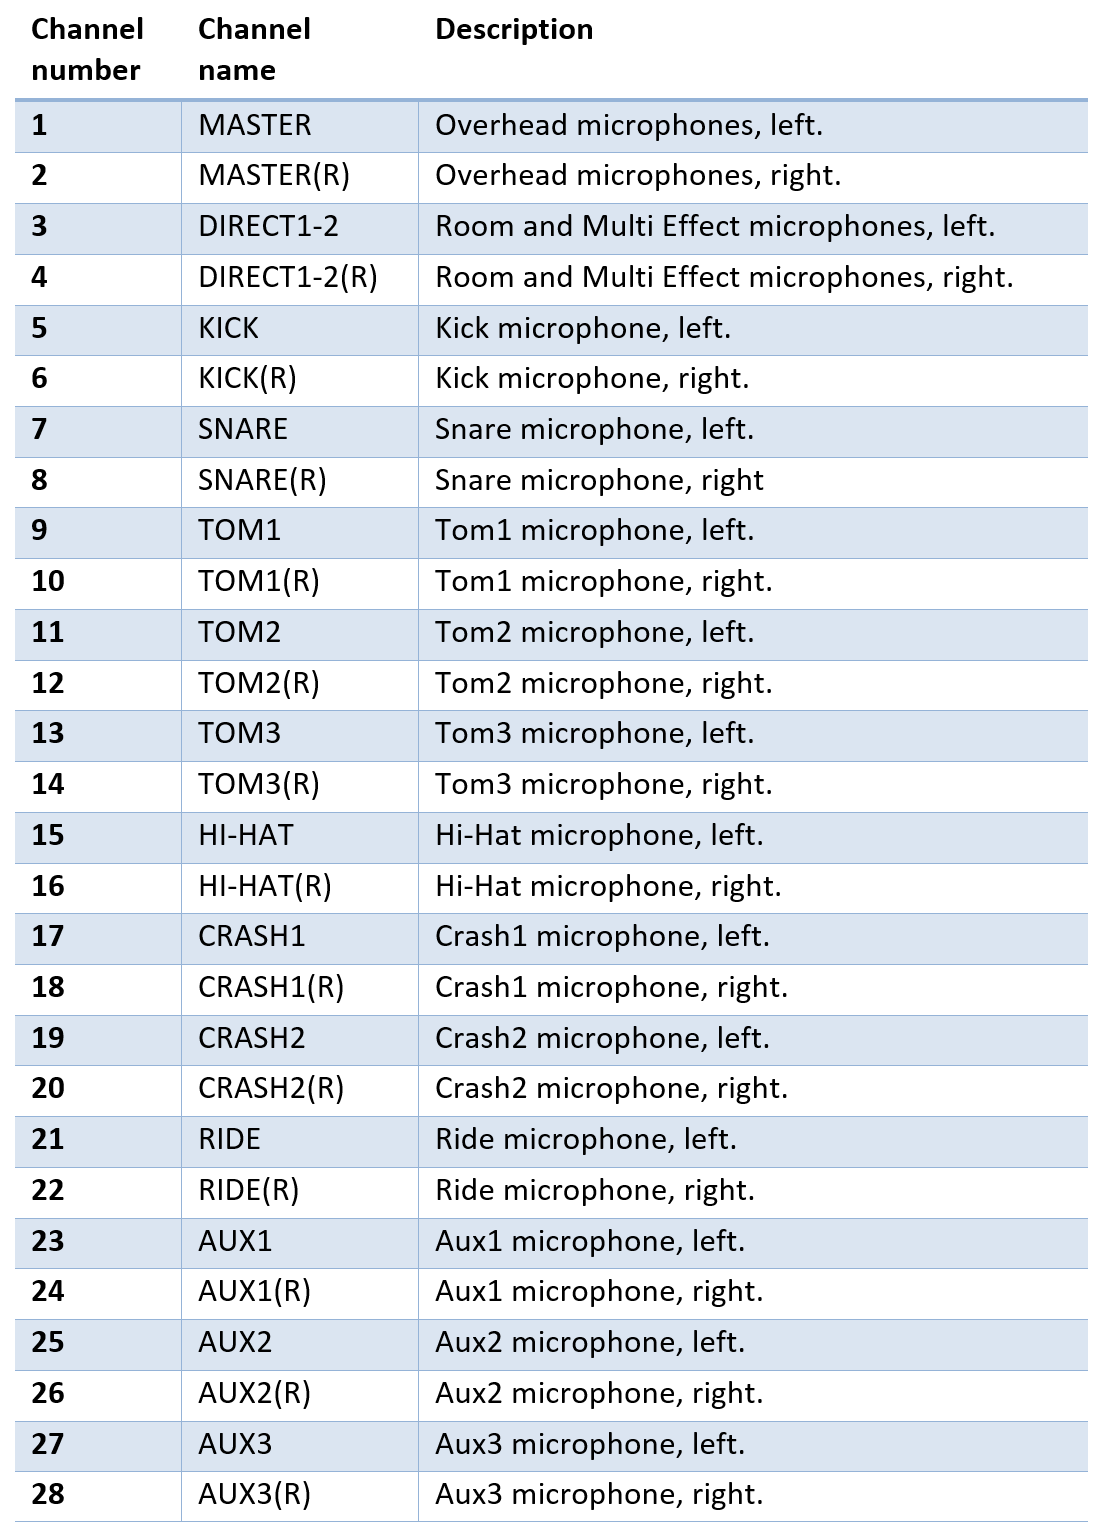
The “Channels:” list will be populated with inputs from TD-27 module.
Ensure the list is setup in the same way for your system. If not, enable/disable the channels as required. This step is very important. Input settings here must match the output settings on the TD-27 module.
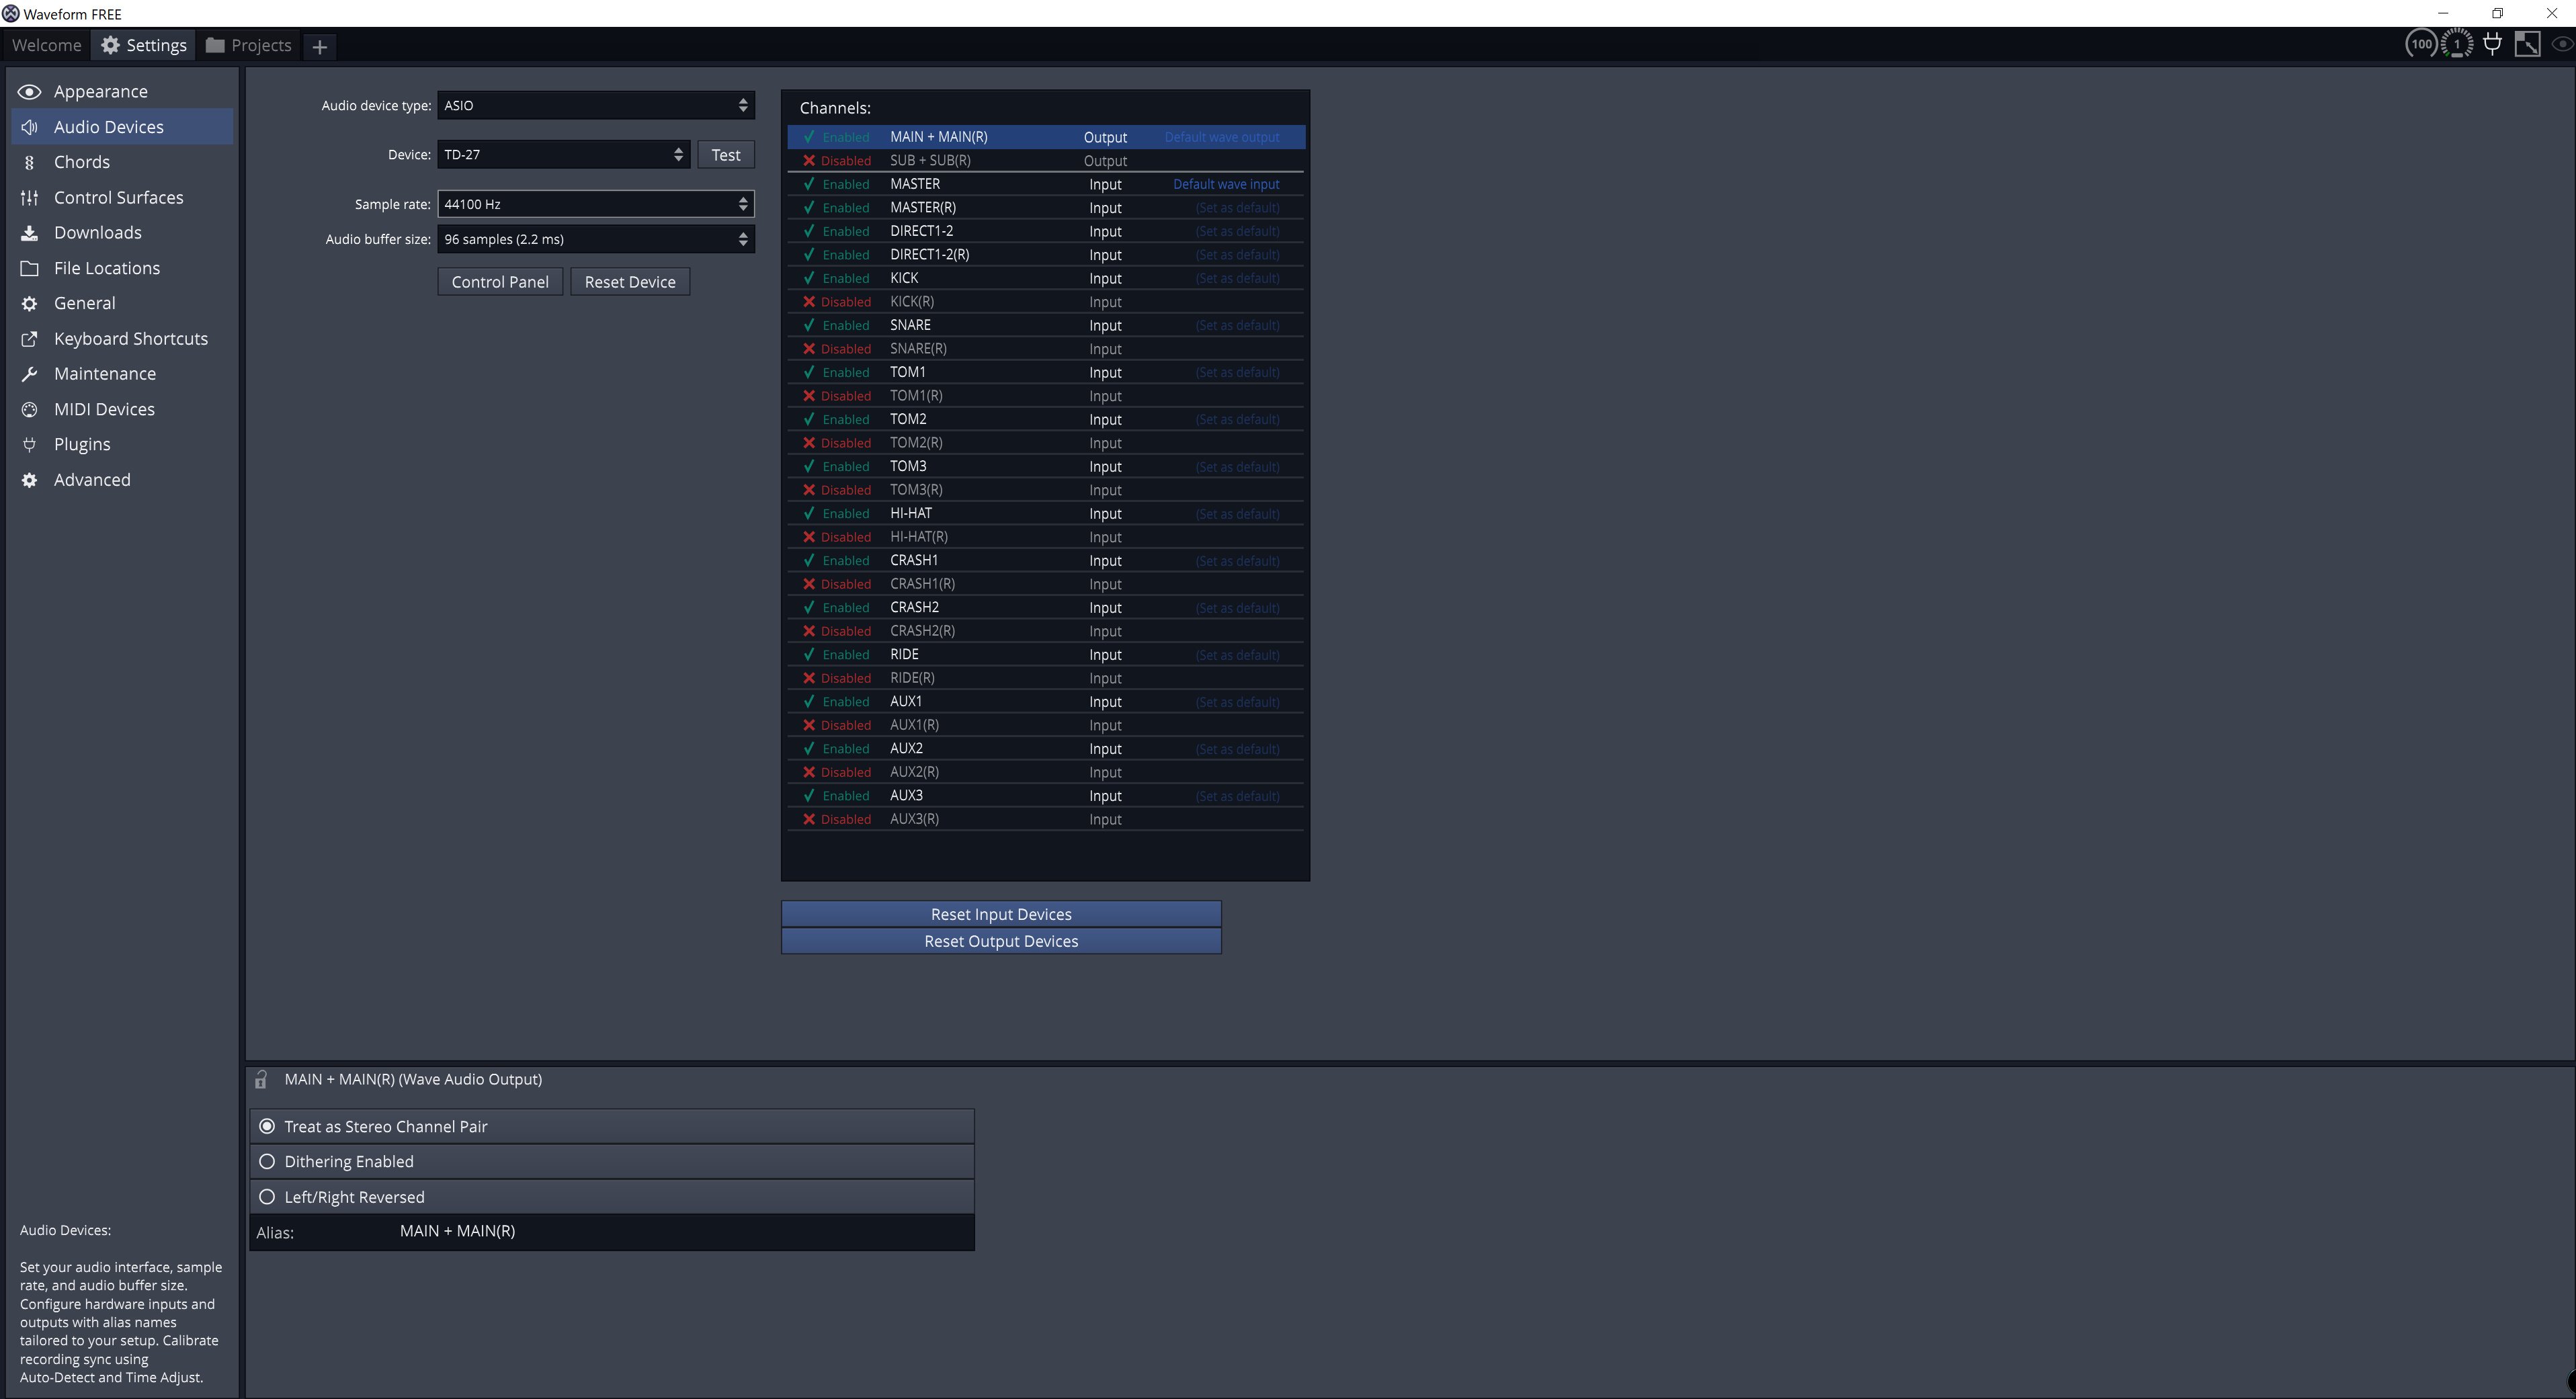
NOTE: Right channel (R) for pad inputs (KICK(R), SNARE(R), TOM1(R), etc.) are not required. Your mixing engineer will almost certainly not use them. I would recommend disabling these inputs to conserve disk space during the recording.
Go back to welcome screen by clicking the “Welcome“ tab in the top-left of Waveform window.
Download the example project file from here: td-27_recording_test Archive 1.trkarch
In the welcome screen, click “Browse all Projects” button.
In the “Projects” window, click “Open Project…”, navigate to the downloaded example project file and open it. Waveform will ask where to unpack project files. Select suitable location and click “Select Folder”. The projects window should look like this:

Double-click on Edit 1. The “Edit” window will open.

All that’s left to do now is arm all channels for recording. Press Alt+R keys on the keyboard. Then, press “Record” button or “R” key to start recording and start to play your drums.
For the purpose of this demonstration, I have recorded “Preview” songs from TD-27 module. Each song was duplicated few times.
Please note that the panning on each channel is set to centre. This will make this mix to sound mono. Feel free to experiment with panning to achieve the sound you like. Also, the peak volume of some instruments is approaching 0dB which is not the best practice. Normally, when I mix my drums, I am trying to keep the peak volume at about
-10dB to -7dB. Mixing engineer can then easily adjust the mix volume for the final mix.
There are tons of video tutorials for Waveform available on the web. I would strongly encourage you to have a look at some of them to get yourself familiar with the functionality of this fantastic piece of software.
If you have any questions, please contact me.